



Repainting crown molding is an excellent way to refresh a room, enhance its architectural details, and give your home a polished, updated look. While it might seem like a small detail, a freshly painted crown molding with crisp, clean lines can dramatically elevate the entire space. Achieving a professional-quality finish, however, requires more than just slapping on a coat of paint. Meticulous preparation, the right tools, and precise application techniques are key to transforming your molding from dull to dazzling.
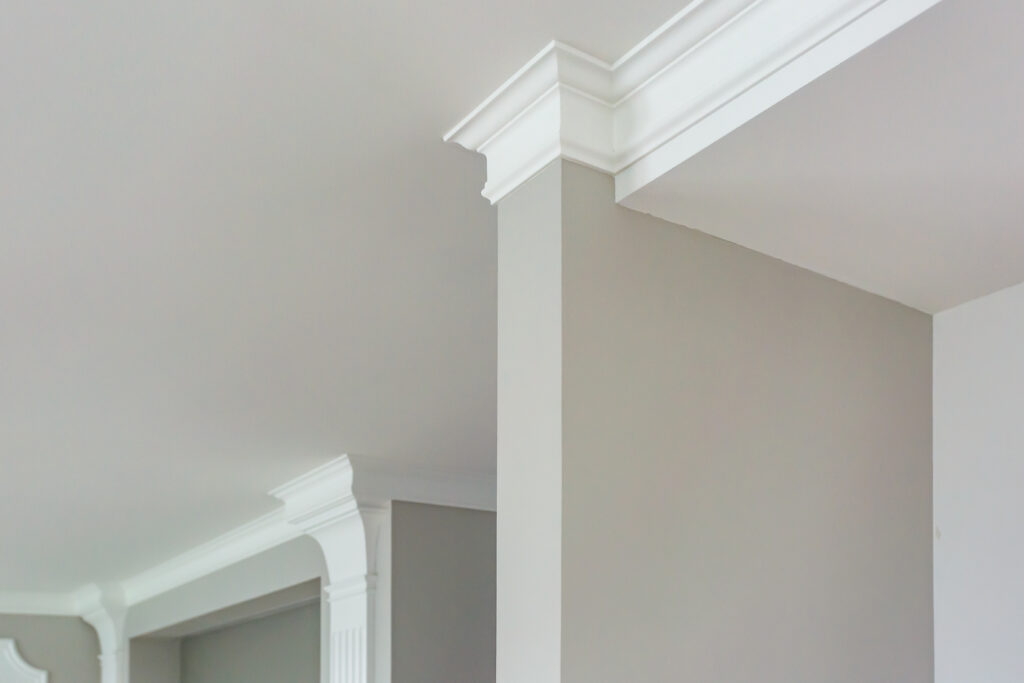
Preparation: Cleaning (TSP), light sanding & primer application
Thorough preparation is the most critical step in any painting project, especially for trim work like crown molding, where imperfections are highly visible. Skipping these steps can lead to poor adhesion, an uneven finish, and premature peeling.
- Protect Your Space: Before you begin, lay down drop cloths or plastic sheeting on the floor and over any furniture in the room. Use painter’s tape to protect the walls and ceiling adjacent to the crown molding if you are not painting them.
- Clean Thoroughly (TSP Recommended):
- Why: Crown molding accumulates dust, grime, grease, fingerprints, and sometimes even smoke residue over time. Paint will not adhere well to dirty surfaces.
- How: For general dirt, a solution of warm water and a mild all-purpose cleaner is sufficient. For tougher grease or smoke residue, trisodium phosphate (TSP) is highly effective. Mix TSP according to package directions (always wear gloves and eye protection). Wipe down the entire surface of the crown molding with a sponge or cloth dampened with the cleaning solution.
- Rinse and Dry: After cleaning, wipe the molding thoroughly with a clean, damp cloth to remove all cleaning solution residue. Allow the molding to dry completely before moving on. Any lingering moisture will compromise paint adhesion.
- Light Sanding for Adhesion:
- Why: Even if the existing paint on the molding appears smooth, light sanding creates a “tooth” or microscopic abrasions on the surface. This provides a better grip for the new paint, ensuring superior adhesion and a smoother, more durable finish. It also helps to smooth out any minor imperfections or previous paint drips.
- How: Use fine-grit sandpaper (180-220 grit) or a sanding sponge. Lightly scuff the entire surface of the molding. You don’t need to remove all the old paint, just dull the sheen.
- Dust Removal: After sanding, thoroughly wipe down the molding with a tack cloth or a damp (not wet) microfiber cloth to remove all sanding dust. Dust left behind will create a gritty texture in your final paint finish.
- Primer Application (Crucial for Best Results):
- Why: Primer serves several vital functions: it creates a uniform, adhesive base for the topcoat; it helps block stains (like water stains or wood tannins) from bleeding through; it ensures consistent color (especially when making a significant color change); and it improves the durability and longevity of the paint finish.
- How: Apply one thin, even coat of a high-quality interior primer. For previously painted molding, a good quality bonding primer is often sufficient. If you’re painting over bare wood, a stain-blocking primer is recommended. Use a brush or small roller designed for trim.
- Cure Time: Allow the primer to dry completely according to manufacturer instructions before applying your topcoat. Proper drying ensures the primer can do its job effectively.
Filling cracks, caulking seams & surface repair
Addressing imperfections before painting is essential for a truly professional and seamless finish. Paint won’t hide flaws; it often highlights them.
- Inspect for Imperfections: After cleaning and light sanding, carefully inspect the entire length of the crown molding for any nail holes, small dents, nicks, or cracks in the wood or existing paint. Also, check for gaps where the molding meets the wall or ceiling.
- Fill Nail Holes and Dents:
- Material: Use painter’s putty or spackle designed for interior wood trim.
- How: Apply a small amount of putty with a putty knife, pressing it firmly into the hole or dent. Scrape off any excess, leaving the surface smooth and flush with the molding.
- Drying and Sanding: Allow the putty to dry completely (check product instructions). Once dry, lightly sand the patched area with fine-grit sandpaper (220 grit) until it’s perfectly smooth. Wipe away dust with a tack cloth.
- Caulking Gaps and Seams:
- Why: Gaps where the crown molding meets the wall or ceiling are common and can make the paint job look unfinished. Paintable caulk fills these gaps, creating a seamless transition.
- Material: Use a high-quality, paintable acrylic latex caulk with silicone added for flexibility.
- How: Load the caulk gun and cut the tip of the caulk tube at a 45-degree angle, making a small opening. Apply a thin, continuous bead of caulk along the entire length of the gap.
- Smooth the Bead: Immediately after applying, run a wet finger, a damp sponge, or a caulk tool along the bead to smooth it out and push it into the gap. Wipe away any excess caulk from the molding or wall/ceiling surfaces promptly with a damp cloth.
- Cure Time: Allow the caulk to dry and cure completely according to manufacturer instructions before painting (this can range from 30 minutes to several hours, depending on the product and bead thickness). Painting over wet caulk can cause cracking or bubbling.
Tip: For a truly professional look, ensure all repairs are completely smooth and flush with the molding. Any bumps or dips will be visible after painting.
Choosing the right paint finish: Semi-gloss vs. Satin
The paint finish (sheen) you choose for your crown molding significantly impacts its appearance, durability, and how it interacts with light.
- Semi-Gloss:
- Characteristics: Has a noticeable sheen that reflects light. It’s durable, highly washable, and highlights architectural details.
- Recommendation: This is the most popular and traditional choice for crown molding. The sheen provides a crisp contrast with flatter wall finishes (matte, eggshell, or satin), making the molding stand out and appear elegant. It’s also very practical for trim, as it’s resistant to scuffs and easy to wipe clean.
- Satin:
- Characteristics: Offers a softer sheen than semi-gloss, with a subtle luster. It’s also durable and washable, though slightly less so than semi-gloss.
- Recommendation: A good alternative if you want a slightly less reflective look than semi-gloss, or if your walls are painted in an eggshell finish and you want a subtle contrast in sheen. It provides a more understated elegance.
- High-Gloss:
- Characteristics: Very reflective, almost mirror-like. Extremely durable and easy to clean.
- Recommendation: Best for a very modern, dramatic, or contemporary aesthetic. However, it will highlight every imperfection in the molding and the paint application, so meticulous prep is absolutely critical. Less common for general crown molding.
- Eggshell/Matte:
- Characteristics: Very low sheen, absorbs light.
- Recommendation: Generally not recommended for crown molding if you want it to stand out, as it will look flat and can be harder to clean. However, if you’re painting the crown molding the same color as the walls for a seamless, height-enhancing effect, then using a matte wall paint with a semi-gloss or satin crown molding (same color) creates a subtle, elegant contrast in sheen.
Paint Type: For interior trim, acrylic latex paint is generally recommended. It’s water-based, easy to clean up with soap and water, has low VOCs, and dries quickly. Advances in technology have made modern acrylic latex paints very durable.
Painting technique: 45° Angle, wet edge & lightweight brush
Achieving a smooth, professional-looking paint job on crown molding requires careful technique.
- Brush Selection: Use a high-quality 2-inch or 2.5-inch angled sash brush with synthetic bristles (for latex paint). The angled bristles allow for precise cutting-in along the ceiling and wall lines. A good brush holds more paint and leaves fewer brush marks.
- Load the Brush Correctly:
- Dip the tip of your brush into the paint, loading only about 1/3 to 1/2 of the bristles.
- Gently tap (do not wipe) excess paint off one side of the brush against the rim of the paint can. This leaves one side of the brush relatively clean and the other loaded, which is ideal for cutting in.
- Position the Brush (45° Angle):
- Hold the brush at a comfortable angle, typically around 45 degrees relative to the surface you are painting.
- Position the brush so that the longer bristles (the “cutting edge”) are against the line where the molding meets the wall or ceiling.
- Paint in Sections, Maintain a Wet Edge:
- Work in manageable sections, typically 2-3 feet at a time.
- Apply paint smoothly and evenly.
- Maintain a “wet edge”: This means always painting into the wet paint you just applied. This prevents lap marks and ensures a smooth, seamless finish. As you complete one section, immediately move to the next, overlapping slightly into the wet paint from the previous section.
- Lightweight, Consistent Pressure:
- Use light, consistent pressure on the brush. Don’t press too hard, as this can splay the bristles and create uneven lines or brush marks.
- Let the paint flow off the brush.
- Smooth Strokes: Use long, smooth strokes along the length of the molding. Avoid short, choppy strokes that can leave visible brush marks.
- Two Thin Coats are Better than One Thick Coat:
- Apply two thin, even coats of paint rather than one thick coat. Thin coats dry more evenly, are less prone to drips and runs, and provide a more durable finish.
- Allow the first coat to dry completely according to manufacturer instructions before applying the second coat.
- Cutting-In Technique (for Sharp Lines):
- If not using tape, use a very steady hand. Load the brush as described, with paint on one side.
- Position the brush so the “clean” side is against the wall/ceiling, and the loaded side is on the molding.
- Use the very tip of the angled bristles to guide the paint along the line. Use your non-painting hand to brace your painting arm for extra stability.
Selio Silva Painting’s tips for sharp, clean lines
At Selio Painting Silva, achieving clean, sharp lines on crown molding is a hallmark of our professional craftsmanship. Our meticulous process ensures a flawless finish that enhances your home’s architectural beauty.
- Meticulous Surface Preparation is Non-Negotiable: We emphasize that the quality of your lines starts long before the paint can is opened. Our team meticulously cleans, repairs, fills, sands, and primes every inch of crown molding. A perfectly smooth and clean surface is the only way to get a truly sharp line.
- Strategic Use of Painter’s Tape: While our skilled painters are adept at freehand cutting-in, for projects demanding absolute perfection, in areas with delicate wall finishes, or when a razor-sharp contrast is paramount, we utilize high-quality painter’s tape. We apply it with extreme precision, pressing down firmly with a putty knife or finger to create a tight seal that prevents any paint bleed-through.
- “Seal the Tape” Technique: For the ultimate crisp line, after applying painter’s tape, we often apply a thin coat of the existing wall or ceiling color along the edge of the tape. Once dry, this seals the tape’s edge. Any minimal bleed-through will be the old color, which is virtually invisible, ensuring the new crown molding paint creates a perfect, unblemished line.
- Premium Tools and Paint: We invest in the best tools: high-quality angled sash brushes with fine, synthetic bristles that hold a good amount of paint and release it smoothly. We pair these with top-tier acrylic latex paints in semi-gloss or satin finishes, known for their excellent leveling properties and durability.
- Expert Brush Loading and Control: Our painters are trained in the precise art of loading the brush, ensuring just enough paint is on the bristles for a controlled application without drips or excessive buildup. They maintain a consistent 45-degree angle and pressure, allowing the brush to do the work and create a natural, straight line.
- Working in Sections and Maintaining a Wet Edge: We never rush. Our team works in manageable sections, ensuring that each new stroke blends seamlessly into the previous one while the paint is still wet. This prevents unsightly lap marks and ensures a uniform finish across the entire molding.
- Careful Tape Removal: We know the timing for tape removal is crucial. Tape is removed when the paint is still slightly tacky (but not wet) and pulled at a 45-degree angle away from the painted surface. This prevents paint from tearing or peeling with the tape, preserving that perfect line.
- Post-Painting Inspection and Touch-Ups: After the paint is dry, we conduct a thorough inspection, identifying and meticulously touching up any minor imperfections or areas that need a final refinement. Our goal is a flawless result.
With Selio Painting Silva, your crown molding project is handled with the utmost care and expertise, resulting in a finish that truly elevates your home’s interior with clean, sharp lines that speak of quality craftsmanship.
Ready to give your home a polished and refined look with expertly painted crown molding? Selio Painting Silva specializes in professional interior painting, delivering meticulous preparation, precise application, and stunning results for all your trim work. Contact us today for a free consultation and let’s enhance the beauty of your home!